File Translation
The File Translation tool provides a quick and easy way to translate a wide variety of different file types, including:
txt, markdown, md (size limit = 1 MB)
html, htm, xhtml, xml, tmx, json, resx (size limit = 5 MB)
docx, pptx, xlsx, rtf, odp, ods, odt, zip, tar, tgz, resx, bmp, jpg, jpeg, png, pdf, idml (size limit = 25 MB)
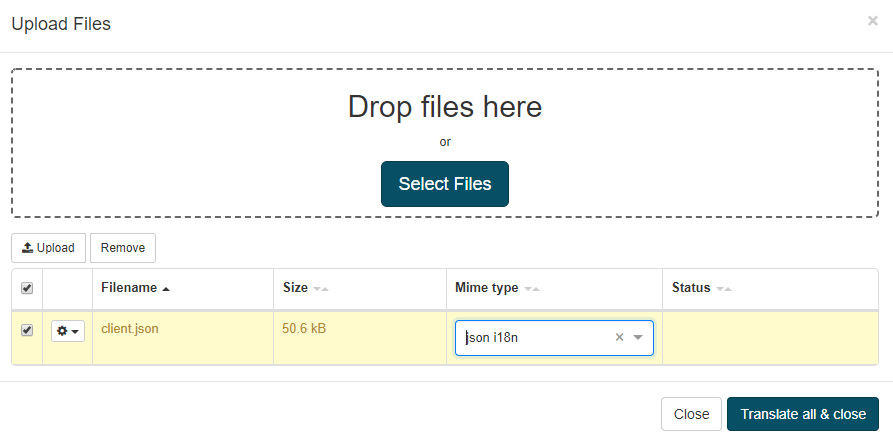
Note
Systran Translate supports the following json structures: json standard (do not specify a Mime type when you are uploading your json) and json i18n (see https://webtranslateit.com/en/docs/file_formats/json))
Note
The translations of uploaded files will be saved for three days. Post-edited files won’t be automatically deleted and will thus be saved indefinitely. In order to delete these files, click Delete next to the file on the File Translation page.
You cannot translate files that exceed the maximum characters limit configured (1000000 chars). This limit is also applied with API calls
You cannot upload more than 10 files simultaneously
Translating files
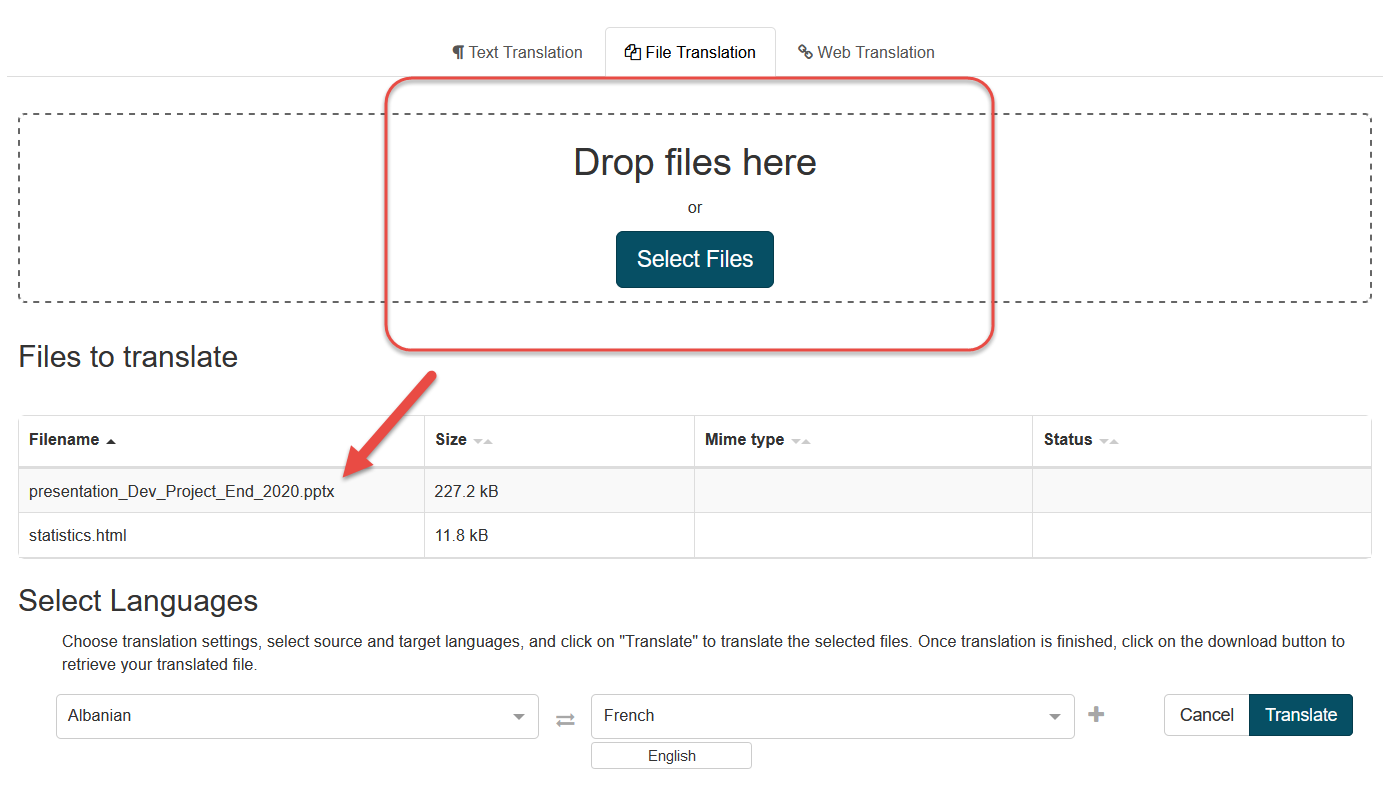
To start translating files, select the file(s) to translate:
Drag & drop files or click Select Files to select one or more files to translate. A list a file to upload will be displayed
By default, all files added will be uploaded. Only accepted formats are automatically translated:
Depending on the file type, specifying the format may be required. For example:
Plain text: Text format including .txt, Microsoft Word file types, etc.
Bitext: A file containing both source and target language versions of a given text
Token form: A file in which the text is tokenized
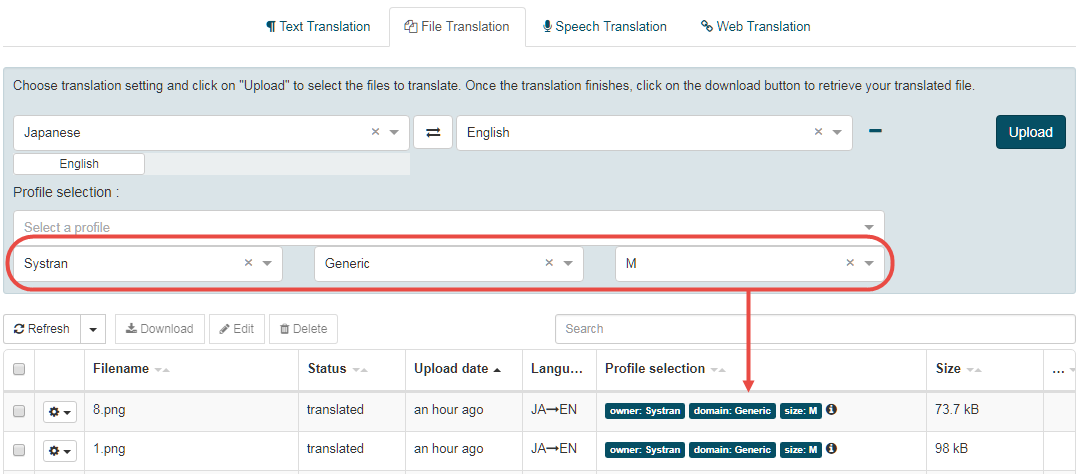
Set the translation settings:
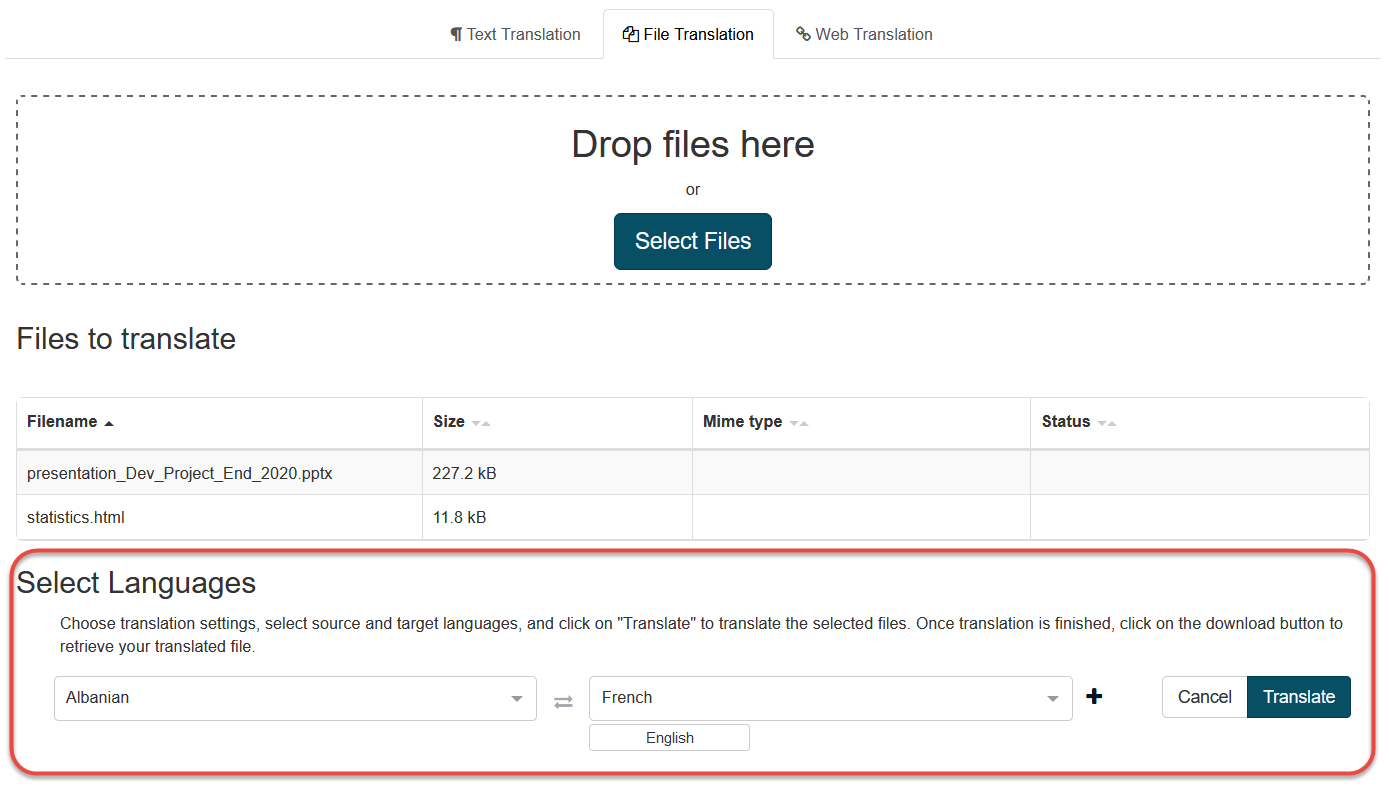
Use the provided drop-down menus to select the Source language and Target language for the translation task:
Source language: The language of the original text, prior to translation
Target language: The language into which the source text will be translated
Click on the “plus” button to use the provided drop-down to set a Profile (a set collection of Translation Options and Resources).
If for any reason you wish to cancel the upload, click Cancel
You can click on Translate to upload and initiate translation of all the files.
Your file will appear in the table on the File Translation page displaying all uploaded files
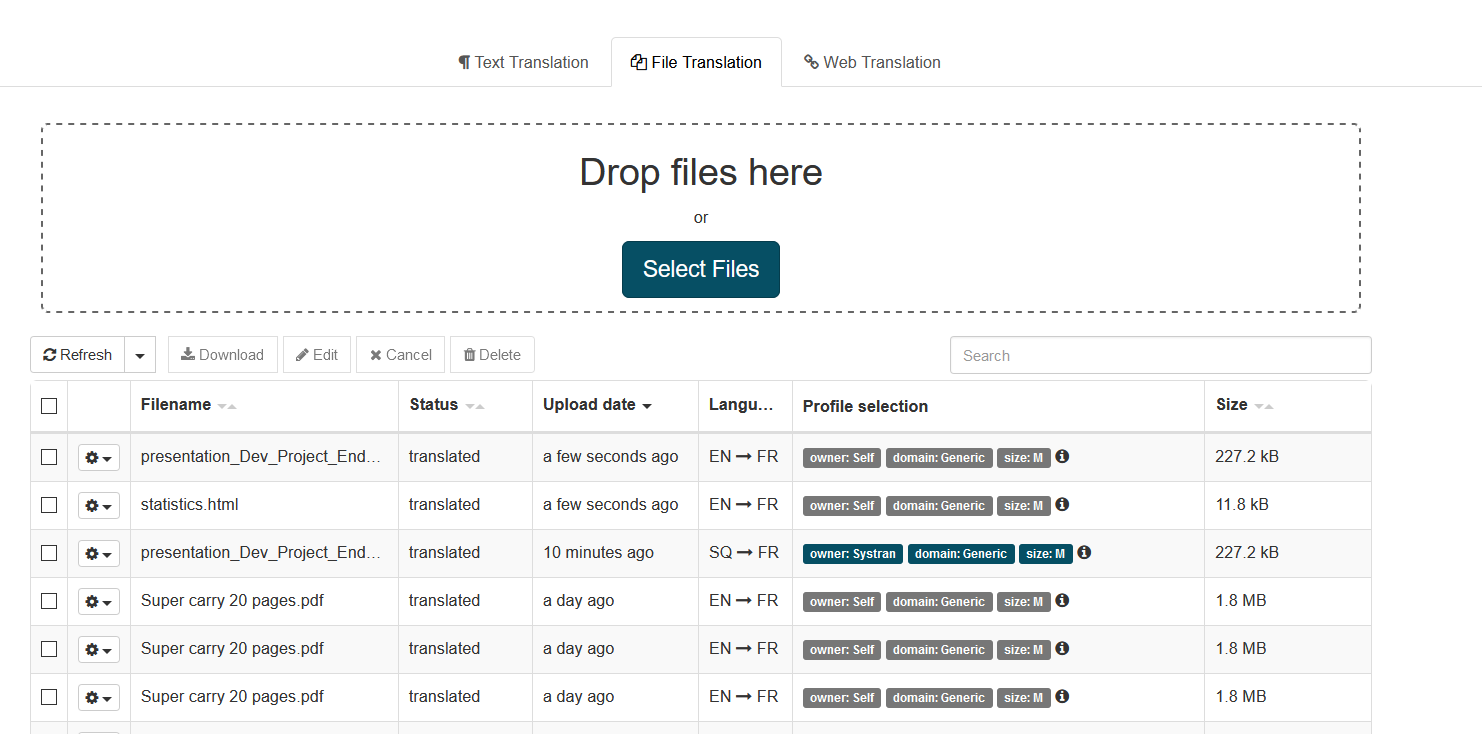
Consult this table to check:
The names of uploaded files
Click on the small triangle in the Filename column header to sort alphabetically by filename
Status of the translation:
queued: request queued for translation
dequeued: request no longer queued but not yet sent for translation
translating: request sent to translator and in the process of translation
translated: translation finished successfully
error: translation finished unsuccessfully
Date: How long ago the file was uploaded
Click on the triangle in the column header to sort by date
Languages: the source language appears first with the arrow pointing to the target language
Click on the triangle in the column header to sort by language (alphabetical order)
Profile selections displays the selectors and the profile used to translate
Click on the triangle in the column header to sort by Profile
File size
Click on the triangle in the column header to sort by file size
From here, you can also take action on translated files as appropriate, using the provided hot buttons.
Edit: Opens the Translation Editor, a tool that allows you to review and manage translations directly on the SYSTRAN Enterprise Server interface
Download: Initiates download of the translated file from the server to the local system. The translated file will be saved as such: result_filename.txt
Delete: Deletes the translated file and removes it from the server
PDF File Translation
There are four modes to translate PDF files:
Precise PDF: This mode parses the text from the PDF. It will provide the best result in terms of text extraction and formatting but requires the PDF to contain extractable text and images will not be processed. The translated result will be a .docx file.
OCR: This mode processes Optical Character Recognition on each page of the PDF file and generates a docx for translation. This mode will work for all PDF types, even for scanned PDF and images, but some errors can occur in the character recognition affecting translation, and formatting can be damaged for tables, drawings or images
FastPDF: This mode will provide the fastest result for PDF translation by retrieving plain text without taking care of images or formatting-style. This feature works only for Text-Based PDFs (extractable text in PDF). The downloaded translated file will have a .txt extension and will lose all the formatting style of the original text.
Auto: the Filter will try to detect if the pdf contains text in this mode, if yes, it will use the Precise PDF mode, if not it will use OCR mode which means the installed OCR filter (IRIS IDRS ©)
Warning
PDF Translation is not a 100% guaranteed feature. Quality of the output file depends on the encoding or fonts for searchable PDFs, or on the quality of the images or scans for non-text PDFs.
Some languages are currently not supported in PDF translation due to limited OCR support, like Bengali, Hindi, Burmese, Pashto, Tamil, Urdu, Punjabi, Armenian, Georgian, Tadjik.
Auto Detect mode for PDF translation with OCR is limited by design. When possible, it is better to precise the source language, as Language Identification on OCR is less precise and may produce errors.
When uploading a file in the File Translation menu, users have the choice to select between different modes to translate the PDF file:
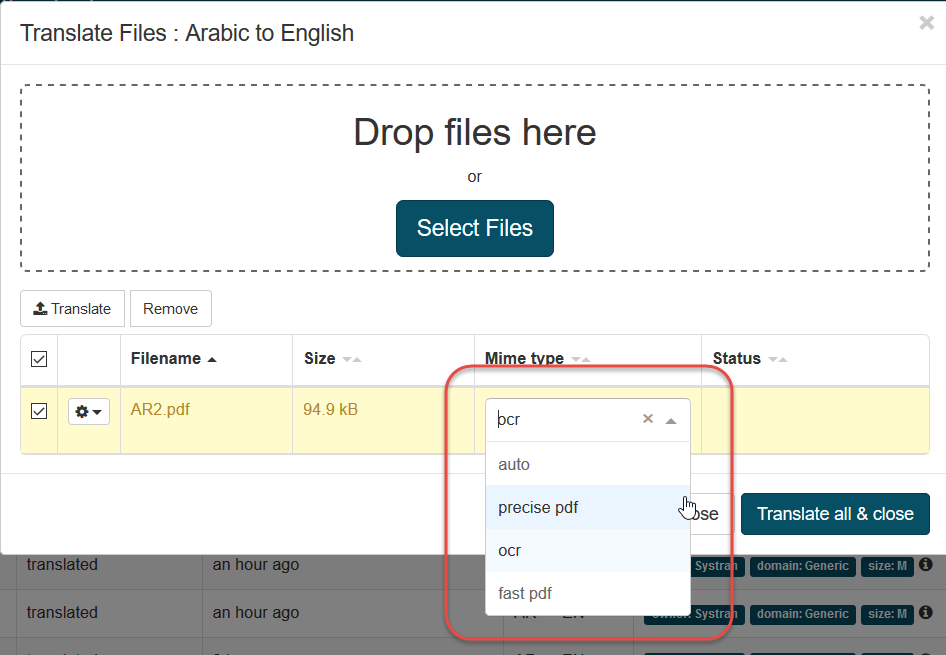
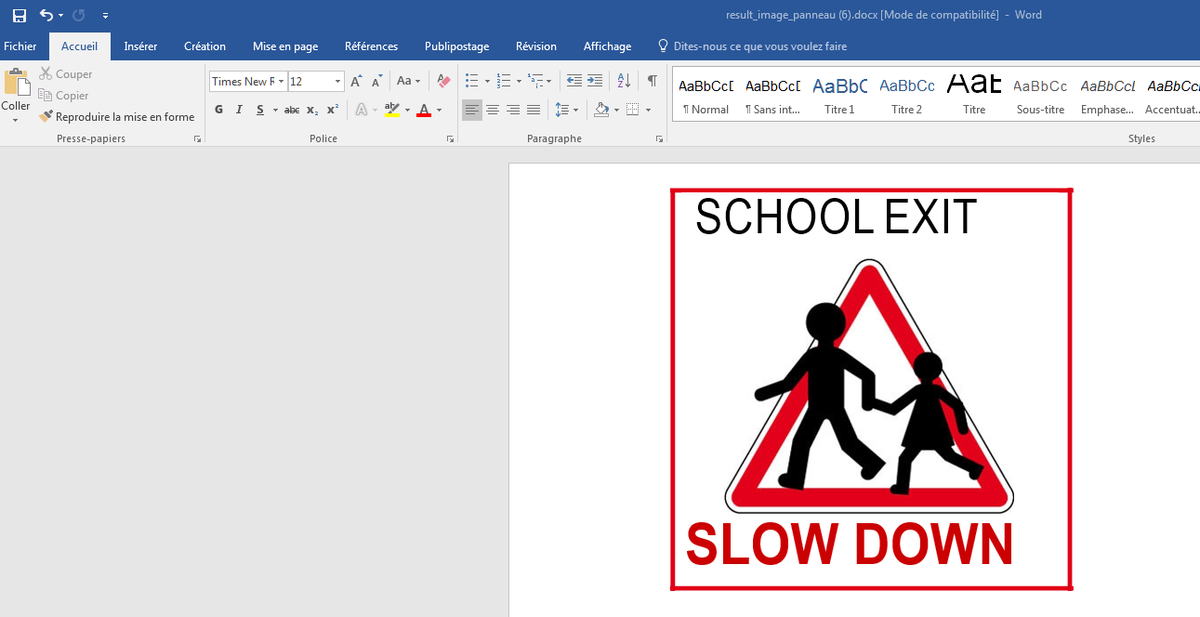
Image File Translation
Supported image formats are: bmp, jpg, jpeg, png, tif, tiff
The translated file will be in docx format:
The following formats are accepted:
for bmp: ‘image/bmp’
for jpg and jpeg: ‘image/jpeg’
for png: ‘image/png’
for tif and tiff:’image/tiff’
Please note that he quality of the OCR may vary depending on the image, the text orientation, the fonts used and the language.
Translation with Profile Selectors
Expand the profile selector menu by clicking on the + button
In the example below:
‘owner’,’domain’ and ‘size’ are displayed in blue because the user selected them. If no selectors are applied, the system chooses them according to priority rules.
Hover the mouse over the selector to display the label ‘Selected by user’ or ‘Selected by system’:

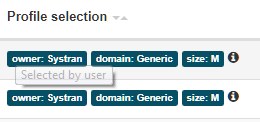
Hover the mouse over the information icon to see what profile has been used:

Translating zip files
To translate zip files:
Click Upload to open the Upload Files dialog
Drag & drop files or click Select Files to select one or more files to translate
Click Upload to upload the files and launch the translation
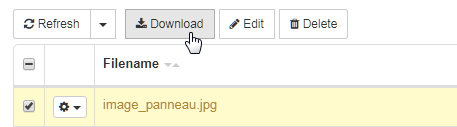
Click Download to download the zip archive

The zip archive (result file) contains all the translated files.

Note
Unsupported files (unsupported format and/or size limit exceeded) will be ignored, other files will be translated
Another archive inside the zip will be ignored
If no file exists in the archive or the file format is not supported, the status will be “no file to translate”
Corrupted files (or if the archive itself is corrupted), the status will be “error” and no file will be translated
If an error occurs during translation:
Each file with an error will have the status “error” and won’t be delivered in the zip containing the resulting translations
A zip archive can be downloaded if at least one file has been translated
Translating Editor
The Translation Editor is a tool that allows you to review and manage the translated segments of your file. Each segment represents a sentence. You can edit translated segments and come back to them later, you can validate translations and download the translated text with your modifications. Additionally, you can convert a validated translation into a Translation Memory for further use in SES9 or other tools.
Reviewing and managing translations
Navigation
To access the Translation Editor, you must first translate a file, and then click on the corresponding Edit button from the Translate Files menu. The Translation Editor displays as follow:
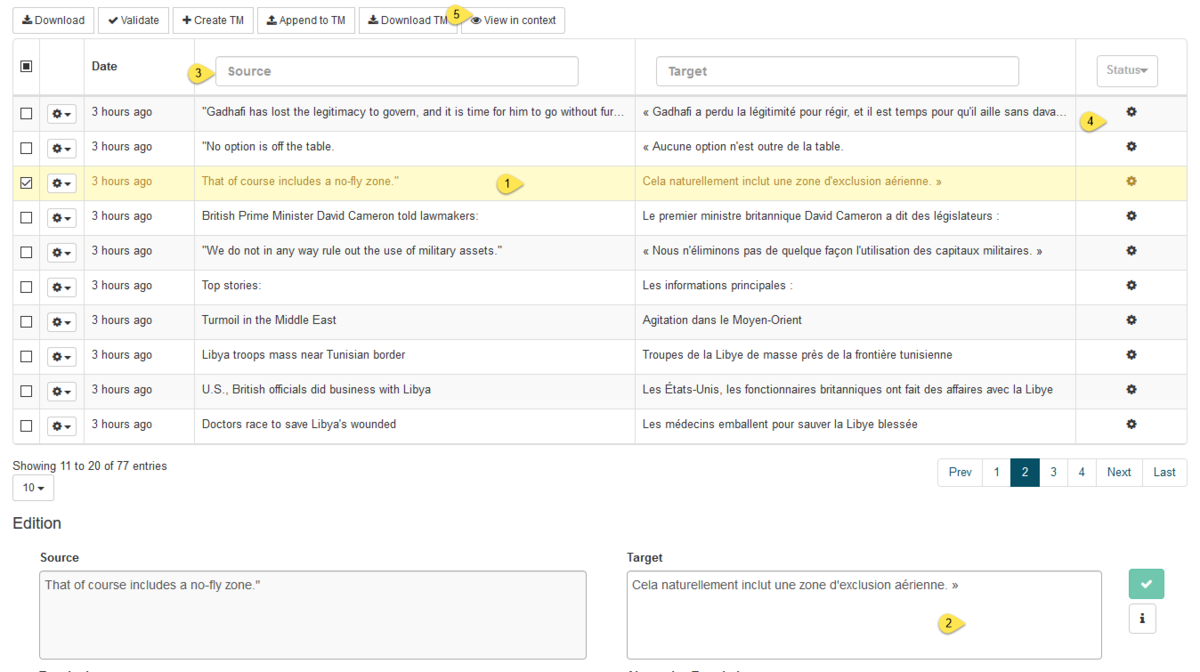
Click on a sentence. The source and translated sentence in review is now highlighted
The translation can be edited and validated in the provided Translated Sentence field
Search boxes at the top of the Source Sentence and Translation columns allow you to search for any word in the text. For example, searching for the word government will display only sentences containing that word
Check the status of the translated sentence in the far right column
More context may be needed in order to verify the translation provided and validate or modify it. To do this, the sentences list can be changed into a view preserving some of the Layout of the document by clicking View in context. A text field will open and display the highlighted sentence to translate within the paragraph. To return back to the sentence by sentence view, click Back to List mode
A drop down menu below the Status column lets you select only certain translations so you can see, for example, all sentences that have been validated and which ones are left to do.
Default: Translations that have not yet been post-edited or validated
Fuzzy Match: There are fuzzy matches available from the Translation Memory for this sentence
TM Match: Translations matched in the Translation Memory
Validated: Translation has been validated
Status: All translations
Shortcuts
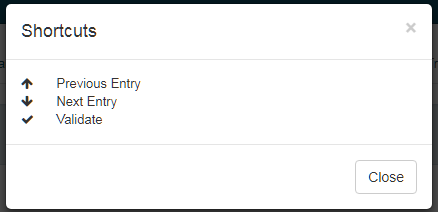
In File and Speech Translation editor and Resources editor (UD, Normalization, TM), the shortcuts are shown via the ‘info’ icon:

Display Options
Below the sentences table, you can change the display options:
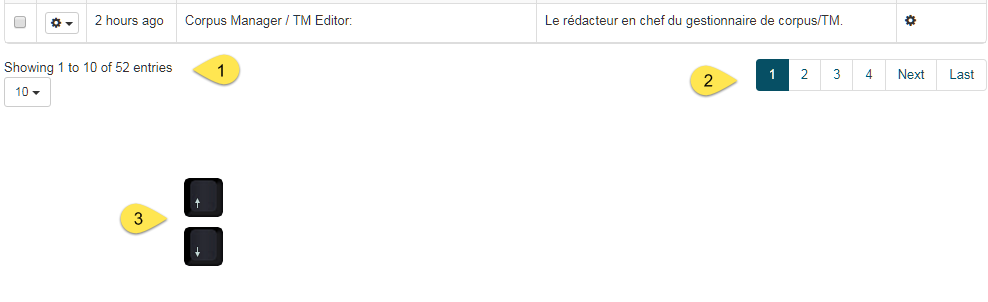
Change the number of sentences displayed per page, so that up to 100 sentences are viewed on the same page
You can also navigate to other pages
You can navigate to following and previous sentences on the same page with the Up and Down arrow keys
Editing Translations
To edit or validate a translation, click on the sentence to translate in the sentence table. The sentence will appear in a text field at the bottom of the page:
To modify the machine’s translation, you can type or delete words directly into the text field
To validate the machine’s translation, click on the green check-mark next to the Translated Sentence text field. The next sentence to validate will automatically appear in the same Translated Sentence field. Validated edits are saved automatically and you can go back to them at a later date
Alternative Translations: If the sentence or a fuzzy match are found in the Profile’s Translation Memory, it will be displayed under the TM tab
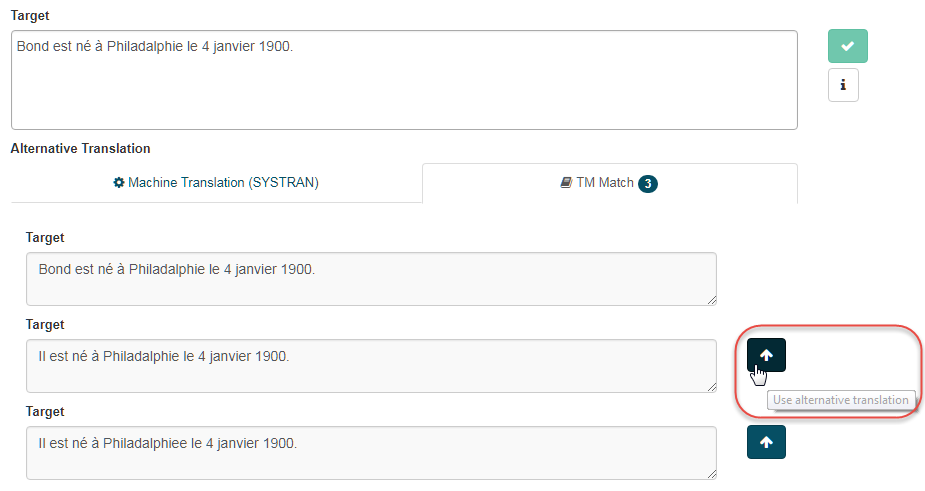
Use alternative translation button to quickly paste the TM match or Machine Translation in the Target field.
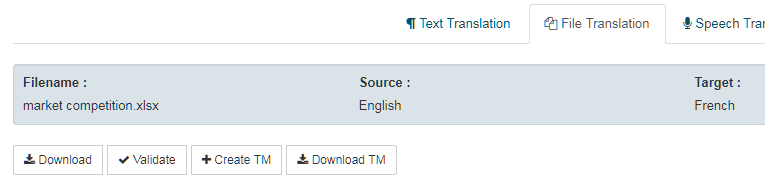
Downloading Translations
Once all translated sentences have been reviewed and validated and you’re ready to transfer the translation from the server to your local system, click Download in the Translation Editor toolbar. The translated file will be regenerated in its original format and the filename will be saved locally as: result_filename.extension
From the Translation Editor tool, you can also create and manage Translation Memory files:
Create Translation Memory: Create a TM on the server and assign a name to it
Download Translation Memory: Generates a TMX or bitext file to download
Profile selection
Owner selector
Owner corresponds to the owner of the translation resource. It can be SYSTRAN or a non-SYSTRAN owner (self or customer name).

The possible owners include:
Self appears only if the user has created a profile and edited the profile options
Customer name corresponds to the owner of the SYSTRAN translation resource
Systran corresponds to the SYSTRAN Translation Resource
Systran and Customer name mean the system will look for a profile created automatically when the customer installs a translation resource and adds at least 1 instance
The following table shows which owner is displayed in the Profile Selection menu by default:
Possible cases |
Self |
Systran |
Default |
|
|---|---|---|---|---|
1 |
If Self is not available |
but Systran is available |
then Systran will be displayed |
|
2 |
If Self is available |
but Systran is not available |
then Self will be displayed |
|
3 |
If Self is available |
but Systran is available |
Neither will be displayed |
|
The priority that applies when translating is as follows:
If Self and Systran are available and neither is selected, then Self is used by default.
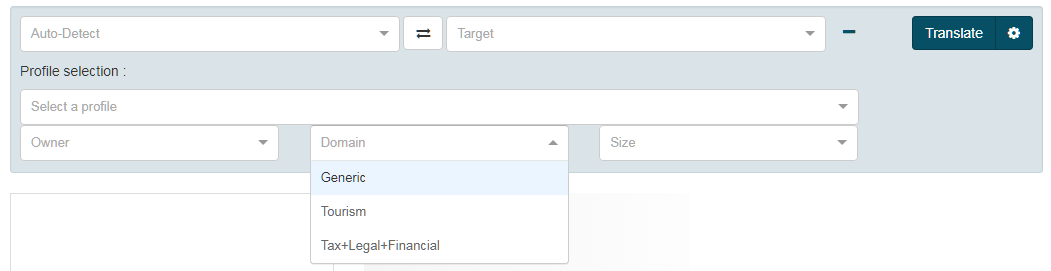
Domain selector
Domain is the domain of the corpus used for creating the translation resource. It can be Generic, IT, Tourism etc. For instance, if you wish to translate all languages with a ‘Tourism’ domain profile, simply select ‘Tourism’ in Domain:
The system will automatically look for the corresponding profile available. If no profile exists, another profile will be found according to the priority rules. The following table shows which domain is displayed in the Profile Selection menu by default:
Possible cases |
Domain available: |
Default Domain display: |
|---|---|---|
1 |
Generic, IT and Tourism |
None |
2 |
Only Generic |
Generic |
3 |
Only IT |
IT |
4 |
Only Tourism |
Tourism |
5 |
etc. |
… |
Note
Domain will be empty if more than 1 domain is available..
The priority that applies when translating is as follows:
If several domains are available and none is selected, Generic is used by default. If several Generic profiles exist, the oldest profile (i.e. the profile created first) will be selected.
Size selector
Size describes the size (both in disk space and computing resource usage) of the translation resource. It can be M (for Medium) or L (for Large). All the profiles installed in Translate are mainly in L size.
The priority that applies when translating is as follows:
- If several sizes are available and none is selected, L is used by default.
Note that if a profile M is requested by the user and this profile does not exist, there is no fall back on an L profile.
Translating with Auto-detection
With the profile selection feature, it is possible to define the desired selectors that will apply to all language pairs.
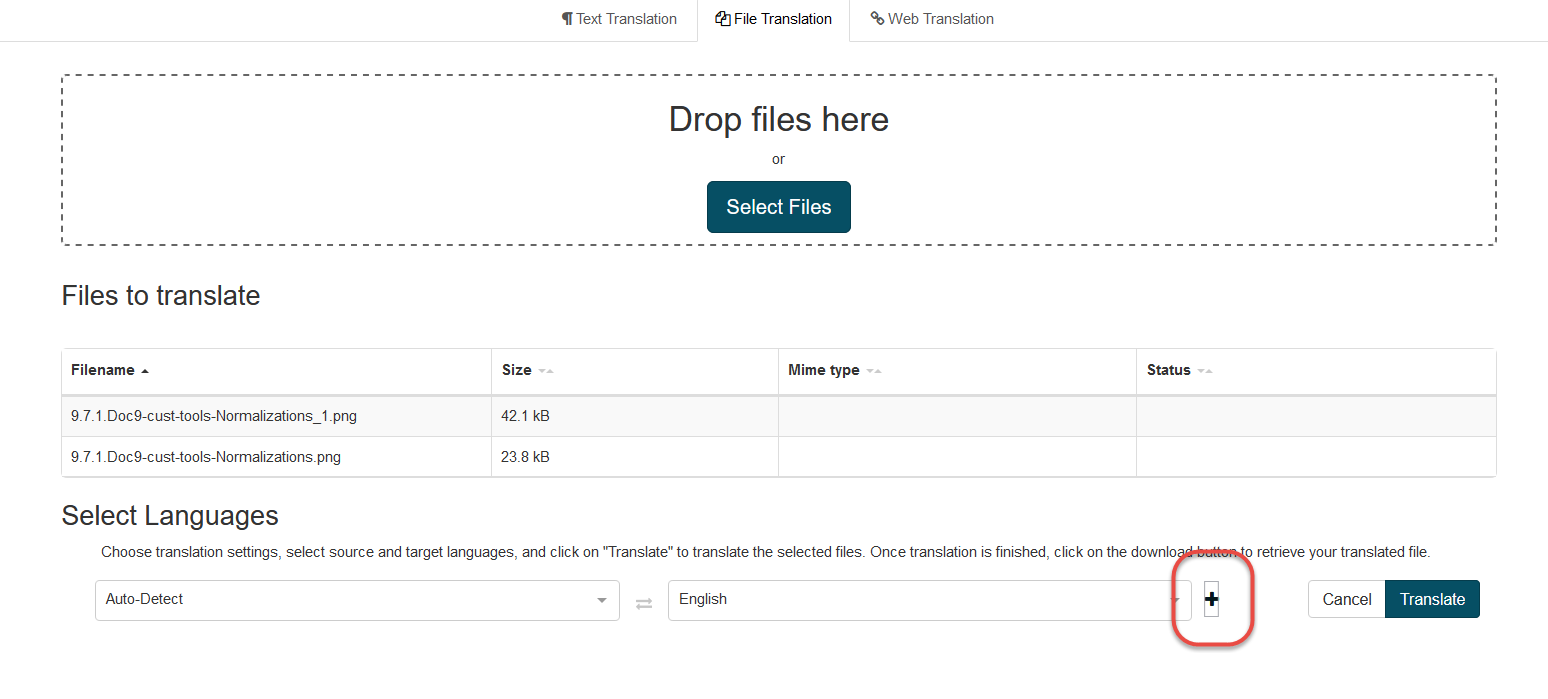
To translate with auto-detection:
Choose Auto-Detect as source language and select a target language
Click on the ‘+’ icon to select the Owner, Domain and Size

This way, selectors chosen by the user will apply and automatically select the preferred domain profiles when available and fall back to a generic profile for language pairs for which the selected domain is not available.
This feature can be particularly useful when translating a batch of files at once, as the profiles used to translate will be filtered independently of the language pair.
Watermark / Disclaimer
Watermark or disclaimer can be added in the translated document, for instance to explain that the document has been translated through Machine Translation.
The Watermark is configurable through the profile options page, in the “More options” section:
To activate the watermark, you need to add the following key option with any text:
“WATERMARK_TEXT”
The text will be added to translated files.
The style of the watermark is configurable through the following options:
“WATERMARK_TEXT_FONT”
“WATERMARK_TEXT_PPTX_FONT_SIZE”
“WATERMARK_TEXT_DOCX_FONT_SIZE”
“WATERMARK_TEXT_BOLD”
“WATERMARK_TEXT_ITALIC”
“WATERMARK_TEXT_UNDERLINE”
“WATERMARK_TEXT_COLOR”
“WATERMARK_TEXT_BACKGROUND_COLOR”
“PRODUCE_READONLY_DOCUMENTS”
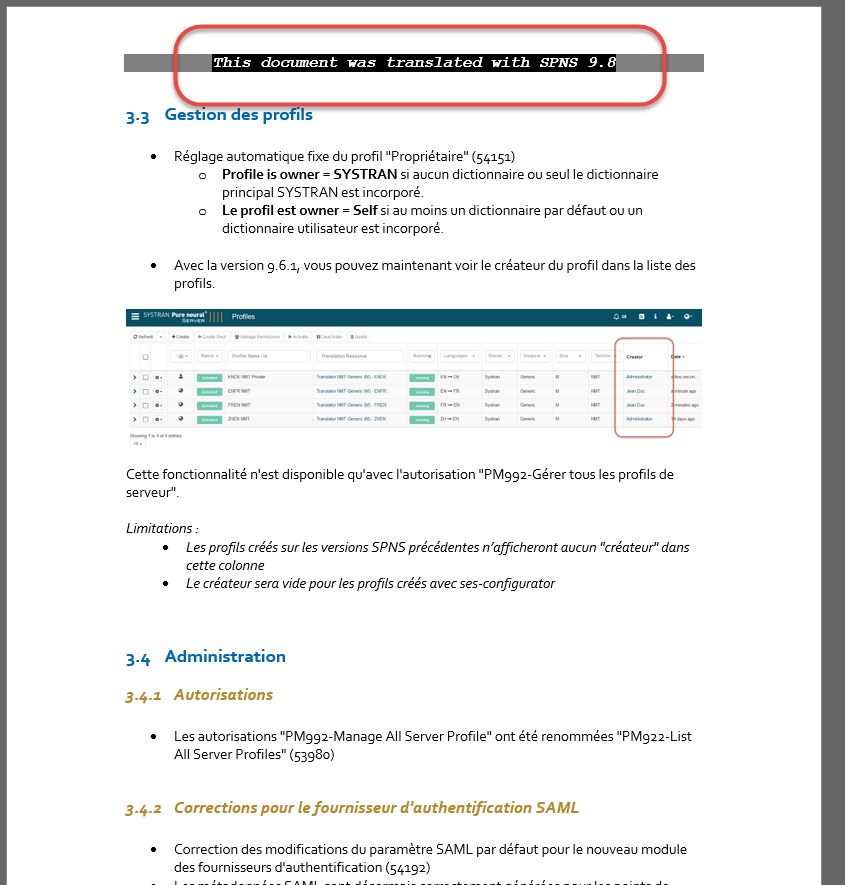
For example, the following configuration:
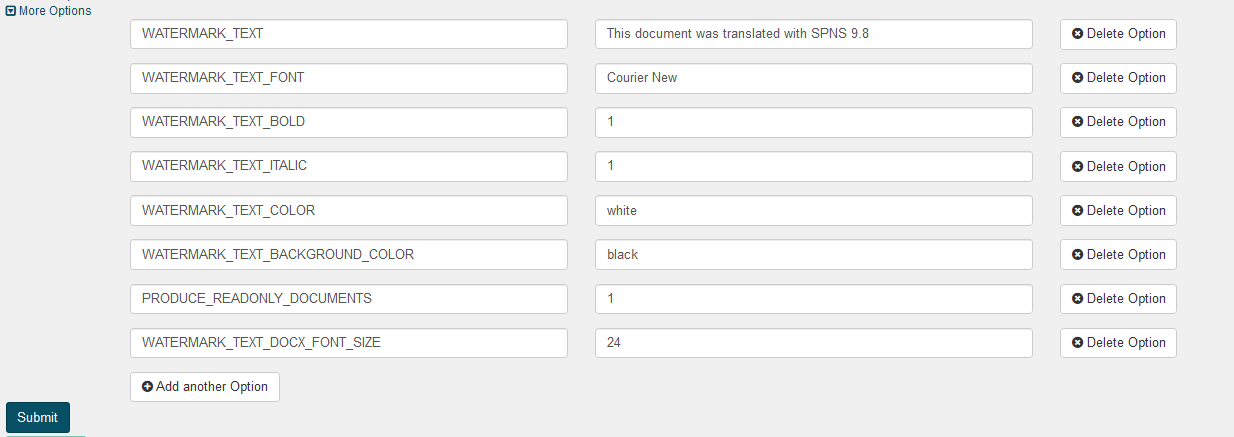
Give the following result:
Note
For the pptx, we must input the html codes for “WATERMARK_TEXT_COLOR”, “WATERMARK_TEXT_BACKGROUND_COLOR” and “WATERMARK_TEXT_PPTX_FONT_SIZE.
For example: the More Options of a profile to enter the blue color: key=WATERMARK_TEXT_COLOR value=0000FF